

The Window Shade Experiment: Ice Dyeing with One Colour
An awkward window, a silk scarf and a little experiment…
One of our Kraftkolour Elves had a bit of a problem at home.
The front entrance had a tall, narrow window that lets in some lovely natural light, but also offered a rather generous view into the house from outside. I wanted to keep the light, add a little privacy and, ideally, make something that looked rather nice in the process.

So, naturally, I decided to turn it into a dyeing experiment!
I set myself a little challenge: could I make a simple window shade using a ready-made silk scarf, one colour of Procion MX dye and as little sewing as possible?
There were a few things to consider. The window was unusually narrow, measuring approximately 2.3 metres high and just 37.5 cm wide. I wanted something lightweight and translucent, rather than a heavy curtain, and I didn't particularly fancy spending hours hemming fabric.
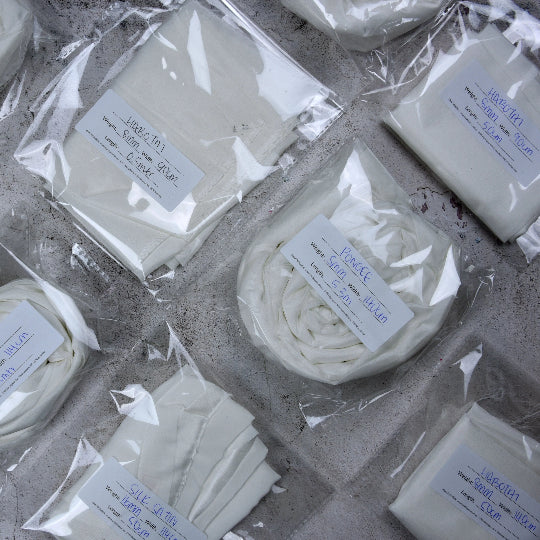
A pre-hemmed Habotai silk scarf seemed like a promising starting point. At 55 × 200 cm, it was close to the dimensions we needed, the edges were already finished, and silk has a lovely way of letting light filter through.
But there was another reason I chose silk.
A LITTLE EXPERIMENT WITHIN THE EXPERIMENT
We often get asked whether Procion MX dyes can be used on protein fibres such as silk and wool. The short answer is yes, but there are a few things to consider.

Protein fibres are sensitive to alkaline conditions, so the soda ash commonly used with Procion MX dyes needs to be handled carefully. Strong solutions or prolonged exposure can damage these beautiful fibres, affecting their strength, softness and lustre.
For a garment or something where the drape and feel of the silk were particularly important, I'd be more cautious. But this was going to be a decorative window shade, so I had a little more freedom to experiment.
If the silk lost some of its softness or sheen, it wouldn't necessarily mean the project had failed. What mattered most was whether the finished shade looked good, let light through and gave us some privacy.
And, of course, I chose Periwinkle Procion MX. It's one of our favourite colours for ice dyeing because of the lovely purples, blues and pinks that can emerge as the mixed dye separates.
So, with one scarf, one colour and a fairly loose plan, I got started.
THE PROJECT AT A GLANCE
The challenge: Make a colourful, lightweight window shade that provides some privacy without blocking too much natural light.
The window: Approximately 2.3 m high × 37.5 cm wide.
The fabric: Pre-hemmed Habotai silk scarf, 55 × 200 cm, 8 mm.
The dye: Kraftkolour Procion MX Periwinkle.
The method: Dye over ice (DOI).
The sewing: Two simple rod channels, stitched by hand.
And because this was a genuine experiment, I'm sharing not just what I did, but what worked, what didn't quite go to plan and what I'd try differently next time.
MATERIALS AND EQUIPMENT
-
Procion MX dye in Periwinkle
-
Soda ash and suitable fabric wash (I used Softly Wool Wash, because it's what I had, don't worry, it's suitable for silk!)
-
Dynazol Washoff to save water
-
Ice
-
Tray or watertight container to collect the melting ice
-
Rack to elevate the fabric
-
Cardboard strips and bulldog clips to contain the ice
-
Optional fleece fabric to help create height beneath the silk
-
Waterproof work surface covering and spare towels
-
Two adjustable tension rods
-
Matching thread, needle, pins and scissors
-
Protective gloves, eye protection and a suitable particulate respirator when handling dye powder
Use equipment dedicated to dyeing rather than food preparation, and follow the safety instructions for your dyes and chemicals.
STEP 1: PREPARE THE SILK
I washed the scarf in warm water with a gentle fabric wash for approximately five minutes, then rinsed it thoroughly.
Next, I soaked it in soda ash solution for approximately 15 minutes and squeezed out the excess.
A note about silk and soda ash: Silk is a protein fibre, and prolonged or excessive exposure to alkaline solutions can affect its strength, texture and lustre. Our scarf retained its soft feel and sheen, but results may vary.
STEP 2: SET UP THE DYEING AREA
I worked in a fully enclosed garage/studio, away from direct sunlight, with a large tray underneath to catch the dye runoff.
A repurposed wire rack was positioned at an angle of approximately 45–50 degrees to encourage the melting ice and dye to flow through the fabric.
Make sure your tray is watertight before starting. Dye runoff has an unfortunate habit of finding any available escape route!
 STEP 3: ARRANGE THE SCARF
Because Habotai silk is so lightweight, I wanted to create taller folds and deeper valleys to encourage interesting dye movement.
I placed leftover fleece beneath the silk, then gathered both fabrics into peaks and folds.
This proved trickier than expected! The silk and fleece didn't grip each other particularly well, making it difficult to maintain the height I wanted.
Once arranged, I surrounded the fabric with cardboard strips secured by bulldog clips to help keep the ice in place.
I assembled everything on a piece of fluteboard, then transferred it to the rack. You could also arrange the fabric directly on the rack.
STEP 4: ADD ICE AND DYE
I covered the fabric with several centimetres of ice, making sure no silk was visible.
Next came Periwinkle.
I sprinkled approximately 24 g of dye powder over the ice. For my 39 g scarf, that's a whopping 62% of the fabric's weight!
For comparison, we usually recommend 4–6% WOF (weight of fabric), which would have been approximately 1.6–2.3 g for this scarf.
Was this too much dye? Absolutely. Do I regret it? Not really! This Elf does have a tendency towards the more is more approach, but in this case, I wanted strong colour coverage with minimal white areas to help provide privacy.
This was a deliberately excessive application for this particular experiment, not a recommended starting quantity.
As the ice melts, the dye travels through the folds of the fabric. Because Periwinkle is a mixed colour, its component dyes can separate as they move, creating variations in colour.
STEP 5: LET THE ICE MELT AND THE DYE REACT
Then came the waiting.
And waiting.
Thanks to Melbourne's rather uncooperative spring weather, our ice took approximately 26 hours to melt!
I left the scarf for approximately another 30 hours before rinsing. If the weather was warmer, I probably would have added another round of ice.

In warmer conditions, the ice may melt much faster. Follow the appropriate dyeing and batching instructions for your fibre and dye, and remember that extended alkaline exposure is a particular consideration when working with silk.
STEP 6: RINSE
Wearing gloves, I began by rinsing the scarf in cold water to remove loose dye.
Despite the generous amount of dye used, much of the excess rinsed away relatively quickly.
As good general practice, I then soaked the scarf in a warm Dynazol bath for approximately 5-10 minutes to help remove any remaining unfixed dye. After a final rinse, the water ran clear.
The scarf was then spun out using a dedicated craft salad spinner, hung to dry and gently ironed while still slightly damp.

STEP 7: TURN THE SCARF INTO A WINDOW SHADE
With the dyeing complete, it was time to make the scarf useful!
I chose two adjustable tension rods, one for the top and one for the bottom. The lower rod helps keep the shade in place when the front door opens.
I folded the ends of the scarf to create channels large enough for the rods, pinned them and secured them with a simple running stitch using matching purple thread.
Finally, I threaded the rods through the channels and installed the shade in the window.
No sewing machine required! Ta da!
WHAT DID I LEARN?
Well, I'm pleased to report that our little experiment was a success! We ended up with a colourful window shade, learned a few things about working with silk, and have some ideas I'd like to try next time.
Silk and soda ash — a pleasant surprise!
One of our biggest questions was whether the soda ash would affect the silk's softness and lustre.
By carefully controlling the soda ash solution, limiting the initial soak and including thorough cold washout with Dynazol, I found that our finished scarf retained its natural lovely soft feel and sheen.
That's an encouraging result! It doesn't mean soda ash is without risks for silk, particularly with prolonged exposure, but it does show what was possible in this experiment.
Those elusive peaks and valleys
Getting the silk to hold deep folds was trickier than expected. Our leftover fleece didn't grip the silk particularly well, so I couldn't create quite the height and structure I'd imagined. I don't think this would have been a problem if using cotton.
Next time, I might try dampening the fleece, experimenting with a different backing material or using geode-style ties to create more defined folds.
Perhaps a little enthusiastic with the dye…
I used 24 g of Periwinkle on my little 39 g scarf. Was that excessive? 100%!
But I wanted strong colour coverage with minimal white areas to help provide privacy, so it was a deliberate choice.
The trade-off was that I didn't get some of the more subtle shades we'd seen in our original swatch for the Ice Dye Colour Chart. But that's okay! Ice dyeing is an experimental technique, and having a go, observing what happens and adapting your technique next time is what it's all about.
Would I try less next time? Probably. Would I be tempted to go overboard again? Absolutely.
A little more attention to the finishing
For this project, I simply handstitched the rod channels using matching purple thread, which worked perfectly well.
If I was making another shade as a gift or wanted a more polished finish, I'd consider sewing the channels with silk thread before dyeing so the stitching could take up colour alongside the fabric.
And the biggest lesson?
Sometimes the best way to learn a technique is to give yourself a practical challenge and see where it takes you.
Not everything went exactly to plan, but that's part of the fun of experimenting. I ended up with something useful, a few new ideas and a better understanding of how the materials behaved.
Not bad for one scarf and one colour! What colour would you have chosen?
💛🧡❤️💜💙💚